The POQTEA Is Hot
Layouts, Part 2
In a previous post, I spoke of switching over to POQTEA. Well, that was 3 months ago now - where am I now?
(Spoiler, I built a keyboard for it, and most of this post is about that)
Speed, I Am Speed
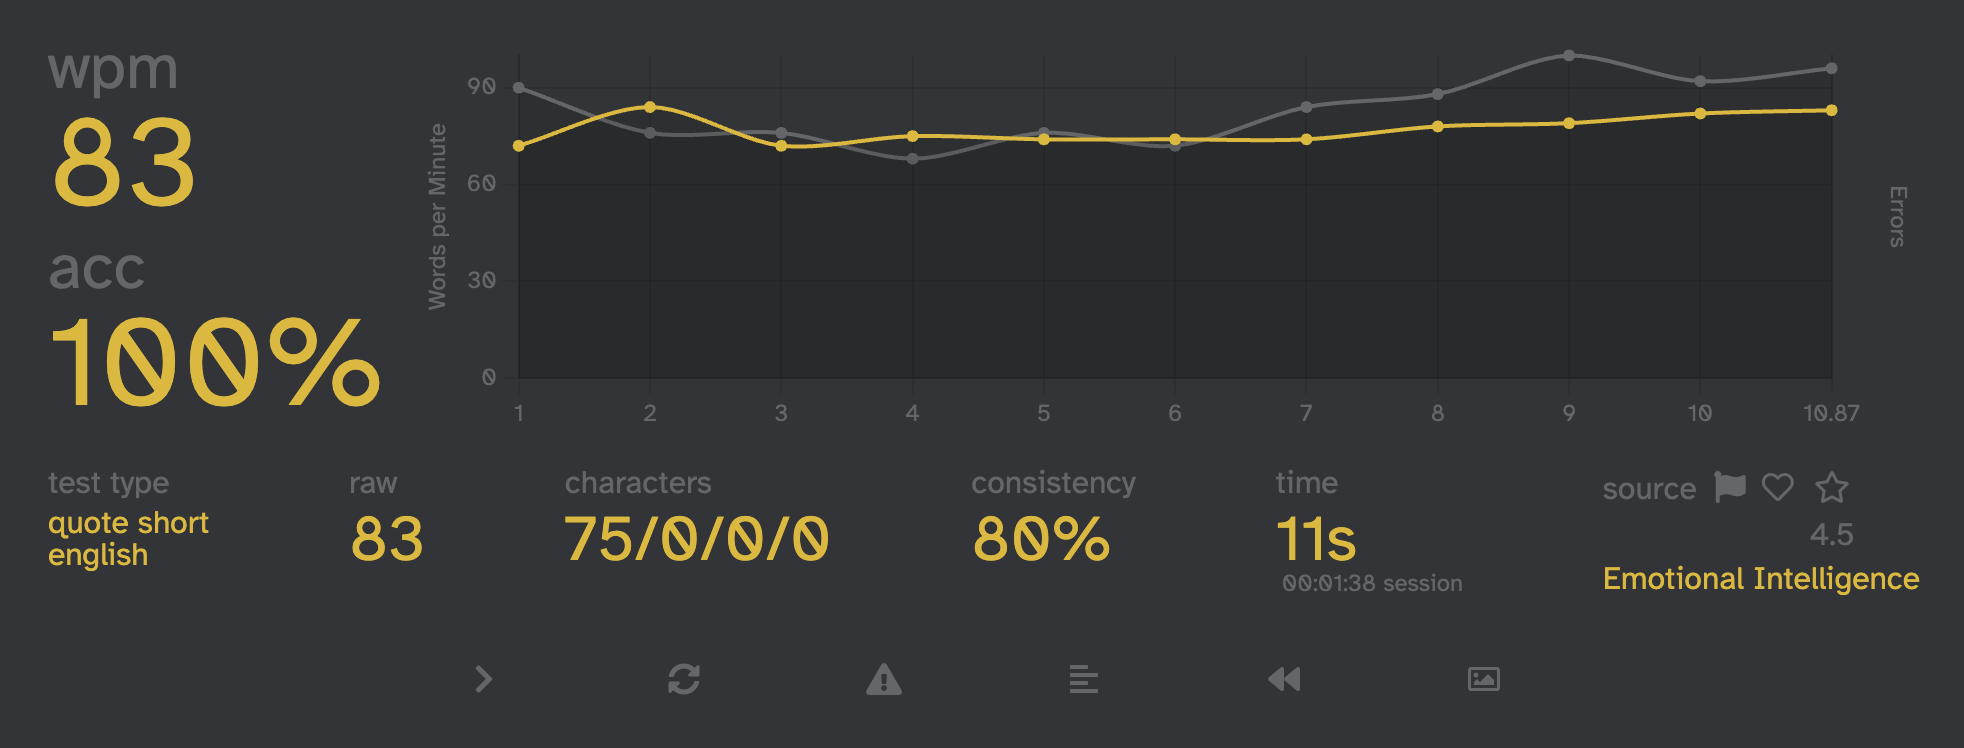
I’m up close to my Dvorak rate of 100-110wpm, with more or less 100% accuracy. I’m not fully there yet, in fact most of the errors I make are simple muscle memory, typing the key where it was in Dvorak. But… I can no longer type in Dvorak, at all. Qwerty is still fine, I can still type 80WPM with high enough accuracy in it. Brains are so cool!
Keyboard, Hold The Dedicated Blog Post
Part of the point of doing all of this, was to build a new keyboard that let me address some worsening back, shoulder, wrist and hand pain. I am still waiting for a part to add in a trackball, but the keyboard itself is done, aaaaand it’s glorious.
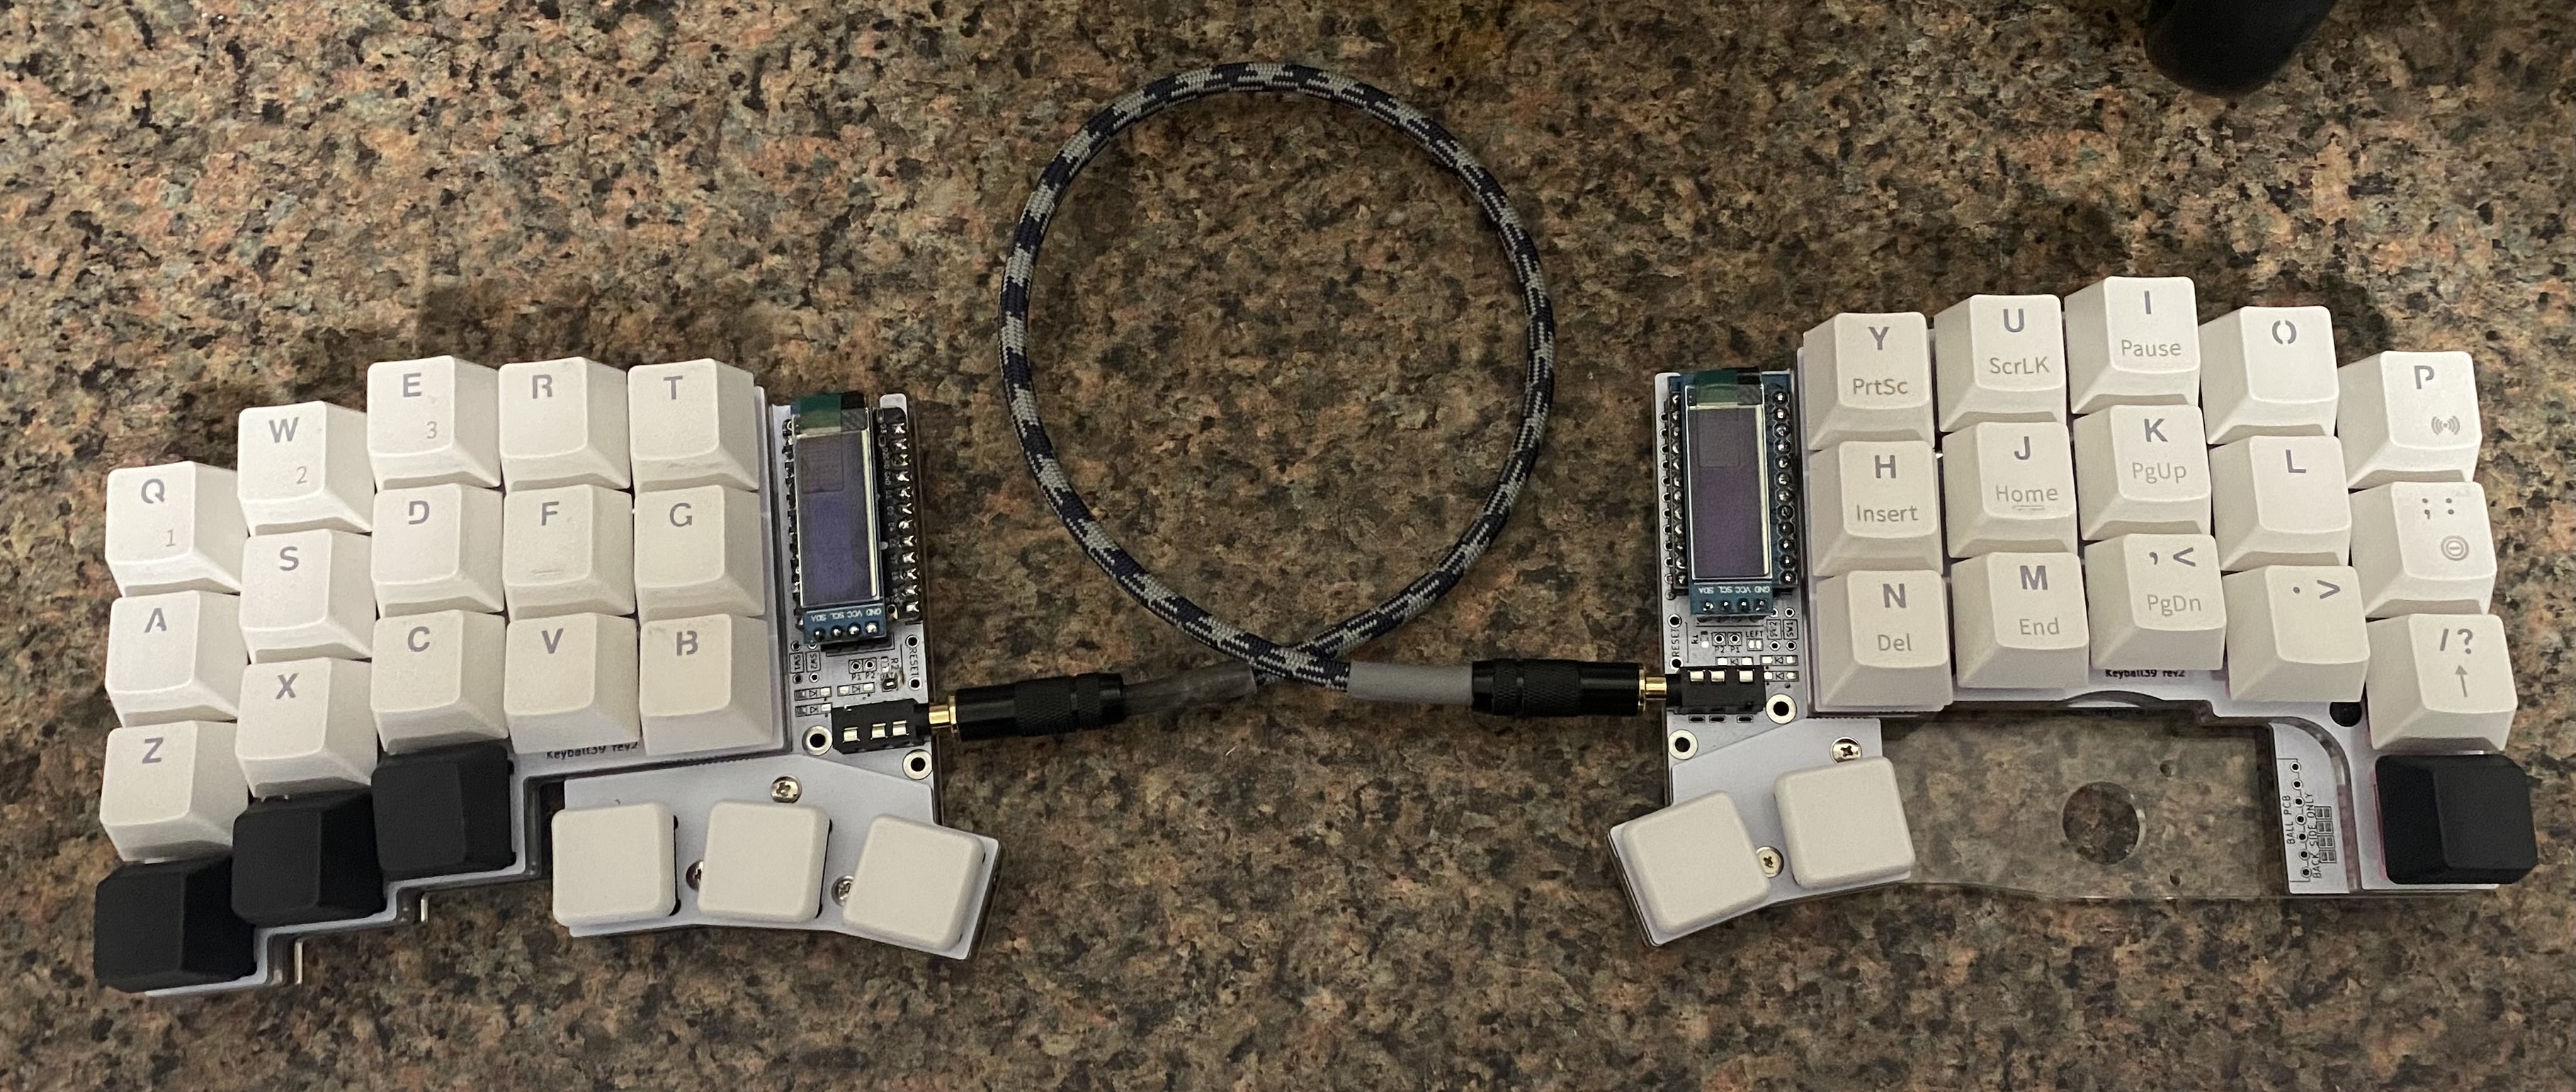
It’s a Keyball39, split keyboard that eventually will also have an incredibly well integrated trackball to allow my hands very little movement. I was unable to order one of the kits from the owners shop, so instead I went through the somewhat painful process of sourcing all of the componentry off of Aliexpress. Next, I used JLCPCB to 3D prints for the trackball housing, and manufacture the PCBs. I had the acrylic pieces laser cut by a company called sendcutsend who did a wonderful job in a small amount of time. (But, somewhat wasteful in the packaging) The PCBs came in great shape, the 3D prints came shortly after in impressively high quality resin.
Build
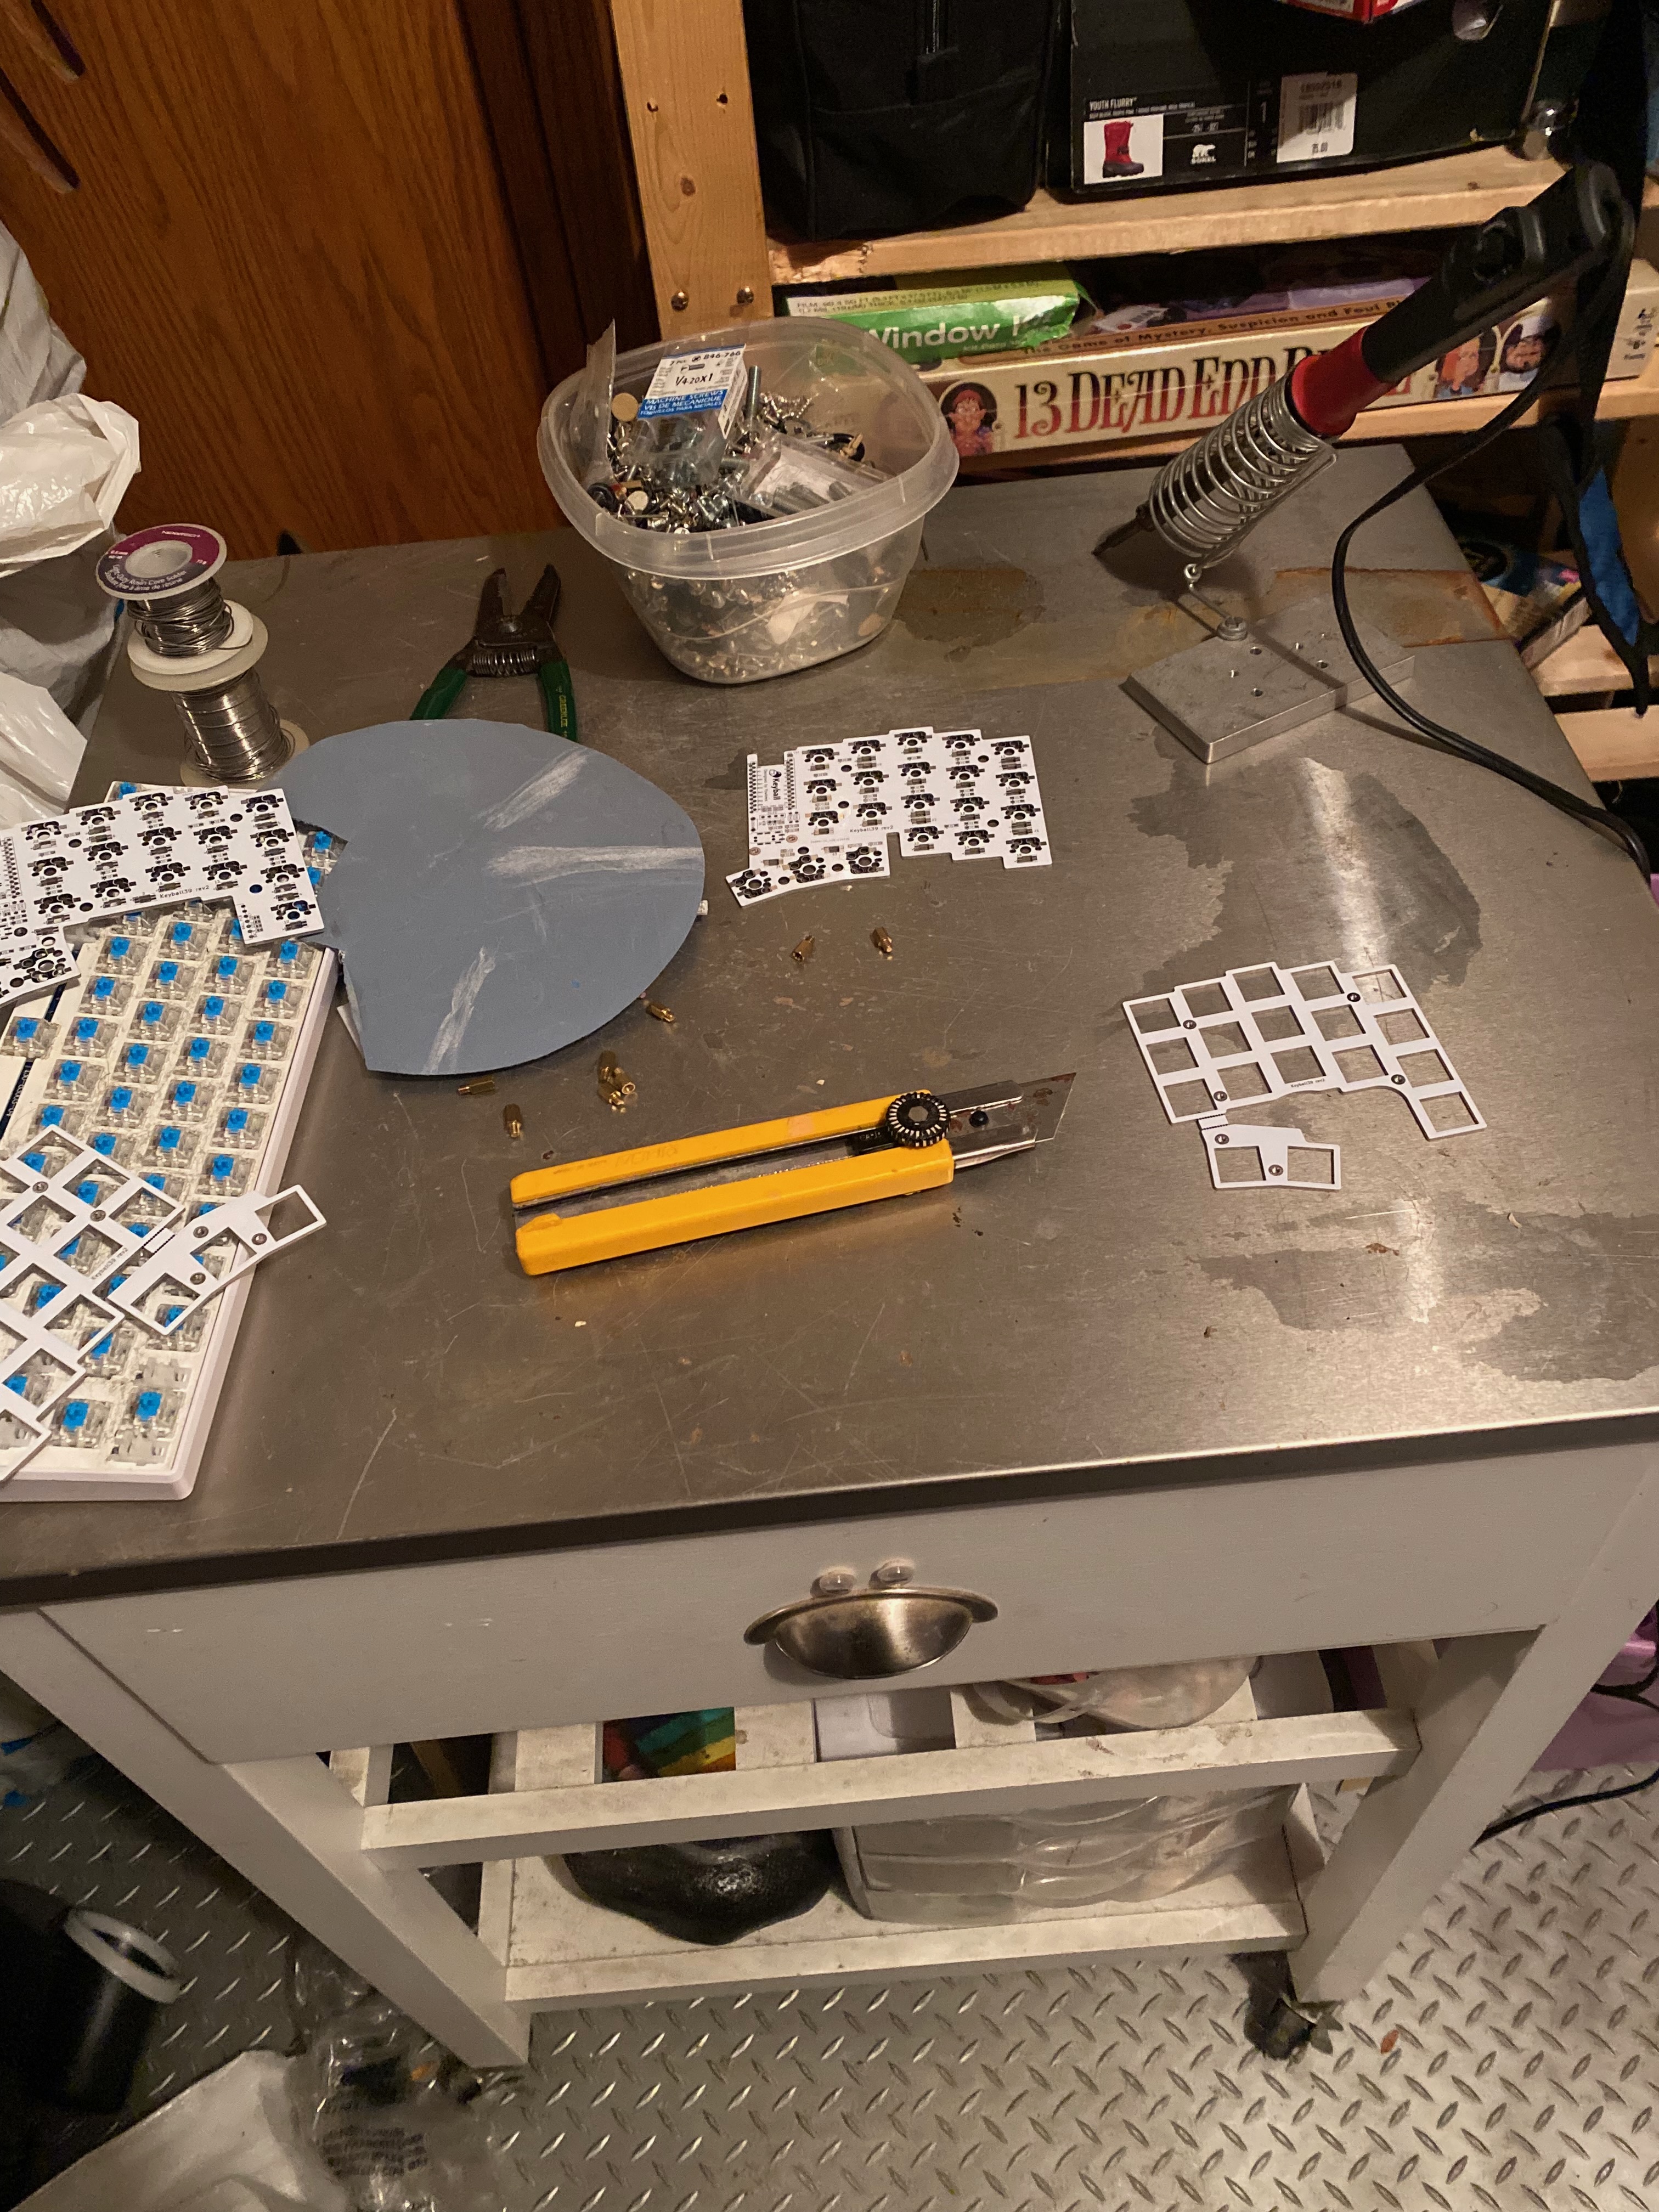
The build was mostly a nothingburger. The guide on the Github is clear, simple, and if I had tested the Pro Micros before soldering it would have been an afternoon chore. Buuuut, they both came in with broken bootloaders, and I didn’t have the extra time to muck about with SPI flashing from something else, though that could be an option for you. …And I ended up pulling out a solder pad or two while desoldering, thanks, patience!
I didn’t take many photos, sorry!
Firmware
The Firmware for this uses the incredible Remap utility, which uses the WebHID spec (Available on Chrome, currently) to flash your keyboard from the browser, even allowing remapping with a clean, intuitive interface. Once you’ve changed the layout to suit your needs, you only have to click “Flash” and it’s loaded on the leyboard, ready for typing. It doesn’t have every possible feature, like hold/tap for non-modifier keys, but it has enough to get me well out of the gate.
Layers!
I took a page from the book of Ben Vallack. I wanted a sense of modality, where I could flow between keyboard states with very little effort, but alse with minimal contortions in my hands. I have a few homerow mods, a dedicated shift key, and a dedicated ctrl. I’m using a very slightly modified POQTEA layout, and have 3 of my 4 available layers laid out, dedicated to this modality in my typing.
First Layer
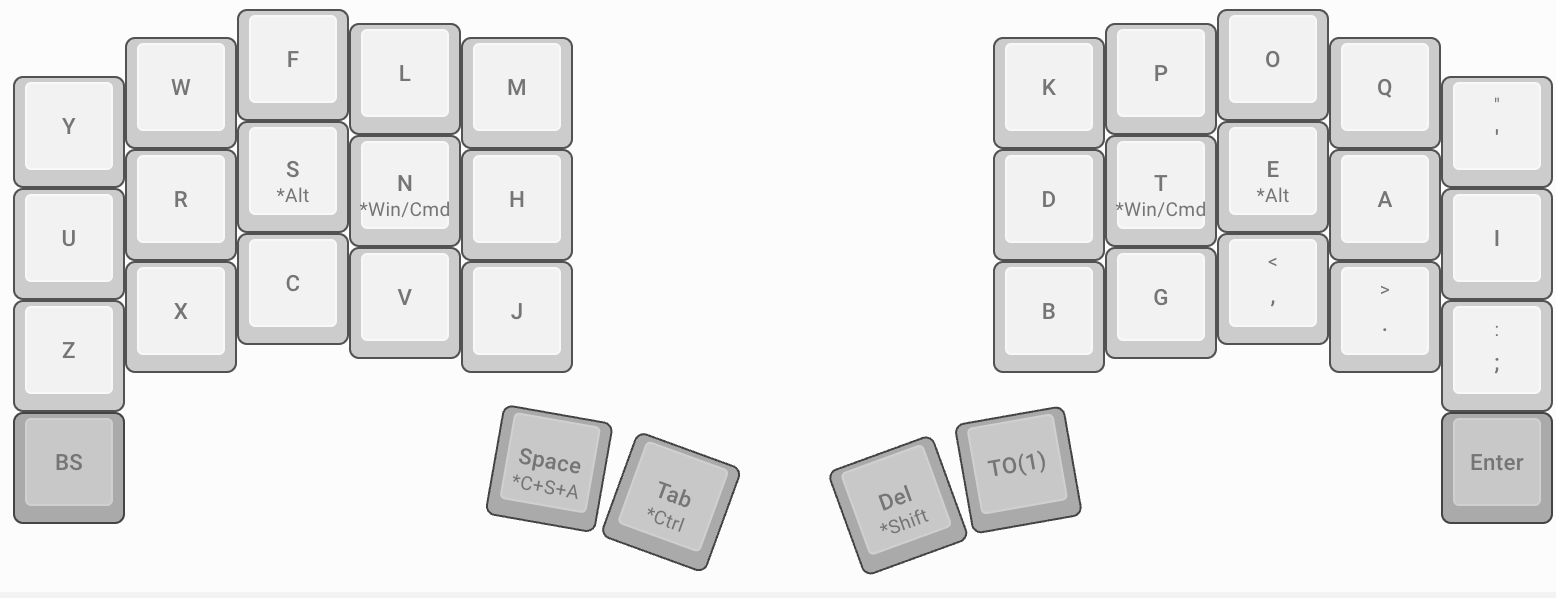
Normal POQTEA, with my [ replaced with ', as having it on my main layer proved very beneficial. I have some unused extra keys, but they actually have been physically removed as they were very uncomfortable to use for me.
Second Layer
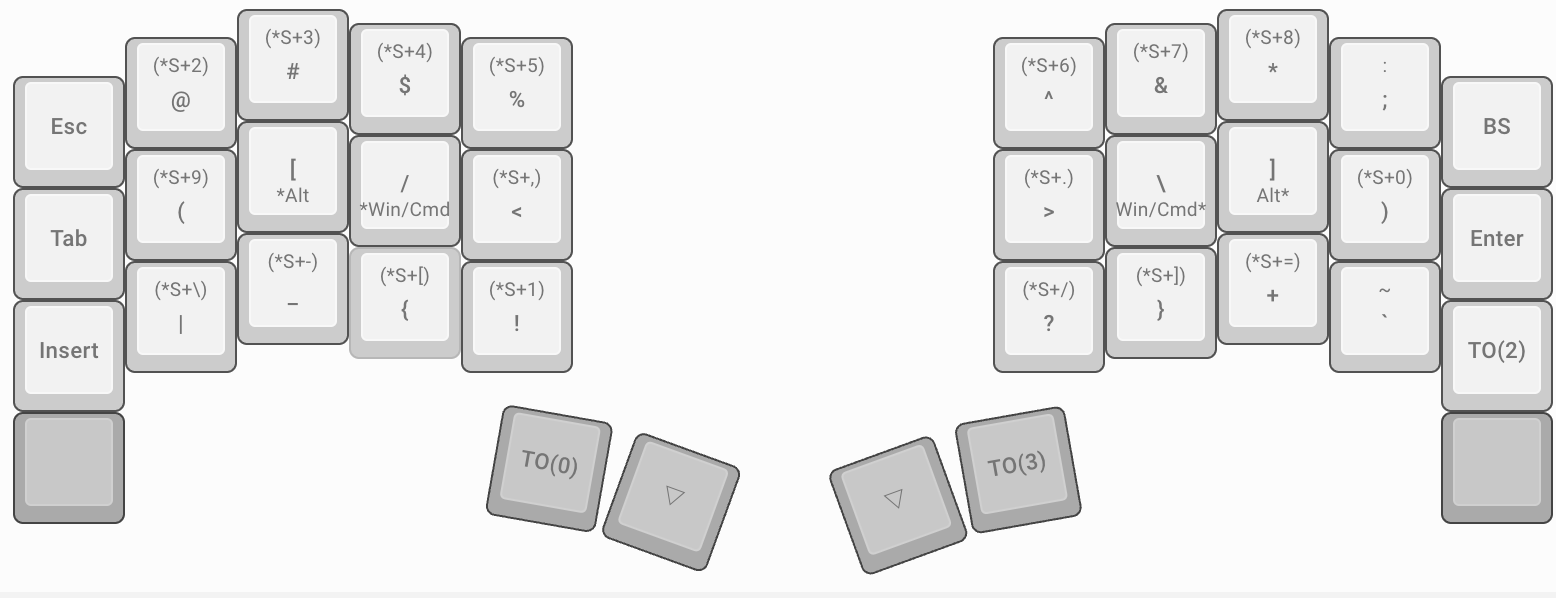
The goal here was to have my symbols sort of similar to the normal number row, then symmetrical pairs of open and closed brackets, etc. I have a redundant tab key that may be removed in the future, a few nice to haves like an enter/backspace/tab/escape/insert, and a few other high frequency symbols. I decided against hiding some symbols under a shift layer, notably <, >, {, and }. I type them constantly at work, so having them as a non-shifted layer item has been a boon.
Third Layer
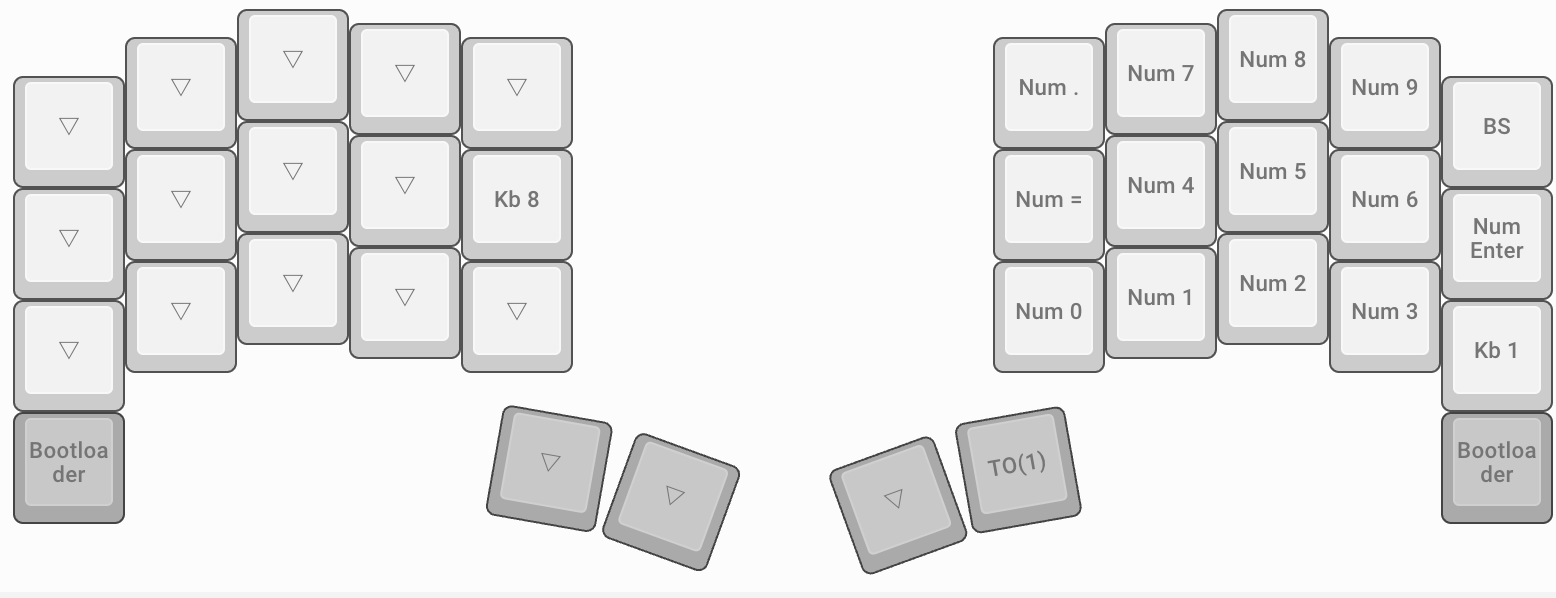
The third layer presently only comprises my numpad. I’m still working out a comfortable position for arrows, media keys, mouse-specific keys, and any others I may find missing.
Future?
My next step is to get very fluent in using my keyboard, building up my muscle memory for where what is, as well as finish out the trackball portion of the build. One thing I realised in using was, I don’t specifically like the bottom row keys, but the furthest key on the bottom is quite handy is a, press with they palm of my hand key. I’ve been using it as an occasional backspace and enter, respectively. But there’s real estate on the left side, and originally I thought of putting in a rotary encoder, for scrubbing along a selection, volume, whatever really. I may revisit that, as well as a wireless version of the build. I will have to see if after using the trackball, I find some interactions would benefit from a single axis, or if I’m just a bit silly and like buttons and knobs and things that glow and beep. Either way, more to come!